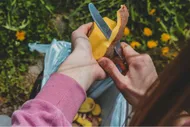
If your banana peels are currently auditioning for a tragic role in your trash can, I have a happier ending for them. Meet vermicomposting: the cozy, indoor, smell-free way to turn kitchen scraps into black gold for your plants. Yes, worms are involved. No, your home will not smell like a swamp. In fact, a healthy worm bin smells like a forest floor after rain—mossy, earthy, and a tiny bit magical.
💚Quick note before we dig in
This post includes a few affiliate links to products I genuinely like using. If you purchase through these links, MySimple.life may earn a small commission at no extra cost to you. It helps us keep the lights on and the worms wriggling. Thank you!
If you have ever thought ‘composting seems cool but… worms?’, you are in the right place. We are going beginner-friendly, drama-free, and smell-free. By Sunday night, you can have a tidy bin happily munching your kitchen scraps and cranking out nutrient-rich castings your plants will adore.
Also, if you want a gentle pep talk on why composting is not gross, I wrote exactly that here: Why Composting Isn’t Gross (And How It Can Be Your Superpower). And once your castings are ready, your houseplants will thank you—see A Beginner’s Guide to Indoor Plant Parenting (the Eco-Friendly Way).

Why vermicomposting is a tiny climate win with big plant perks
- Diverts food waste from landfills where it would otherwise produce methane.
- Creates vermicompost (castings), a gentle, nutrient-dense fertilizer brimming with beneficial microbes.
- Compact, clean, and renter-friendly—no backyard required.
- Surprisingly low-maintenance once you set it up right.

What you will need (and what it will cost)
Choose your bin style:
- DIY tote bin with airflow: Affordable and easy. You will drill ventilation and drainage holes in a plastic tote with a snug lid.
- Stacking tray system: Neat, expandable, and beginner-proof. Each tray acts like a floor; worms migrate up as you add food, leaving castings below.
- Sleek countertop bin: Cute, compact, and often pricier; great for small households and a decor-friendly look.
Starter picks I like:
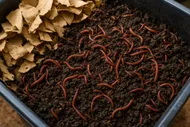
Meet your dream team: red wigglers
Red wigglers are the party guests who hang out where the snacks are. Unlike earthworms that tunnel deep in soil, red wigglers live at the surface where decomposing food hangs out. They thrive in bins, handle variety, and reproduce to match available food.
How many worms do you need?
- Rule of thumb: 1 lb of worms can process about 1/2 lb of food scraps per day once established.
- Start smaller if your household does not produce much waste. You can always feed less or let them scale up.
Pro tip: If you are buying locally, check for Eisenia fetida (or Eisenia andrei). Nightcrawlers and garden earthworms are not suitable for indoor bins.

Bedding basics: the cozy mattress your worms deserve
Think of bedding as the worms’ home and part of their diet. You want it fluffy, breathable, and damp like a wrung-out sponge.
Great bedding options:
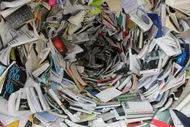
- Shredded corrugated cardboard (avoid glossy inks)
- Soaked coconut coir
- A handful of finished compost or garden soil (for grit and microbes)
- Brown paper, egg cartons, dried leaves
Skip these:
- Dryer lint from synthetic fabrics (microplastics)
- Glossy/coated papers
- Colored inks you do not trust
Moisture check:
- Grab a handful and squeeze. A few drops = perfect. Streams of water = too wet. Bone dry = add water.

Weekend setup: step-by-step
You can do this in a few hours, plus a little patience while your worms settle in.
- Pick your spot
- Temperature sweet spot is 55–77°F (13–25°C). Avoid direct sun, heaters, or drafty entries.
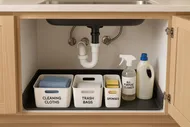
- Kitchens, pantries, laundry rooms, and under-sink spaces work well.
- Prepare the bin
- DIY tote: Drill 20–30 small holes in the lid and near the top sides for airflow. Drill 6–10 holes in the bottom for drainage, and set the bin on wooden blocks or inside a second, hole-free tote to catch drips.
- Tray system: Rinse trays, assemble per instructions, and insert the included coconut coir if provided.
- Make the bed
- Fill the bottom 1/3 of the bin with a mix of moistened shredded cardboard and coconut coir. Sprinkle a cup of garden soil or finished compost for grit.
- Fluff well. It should feel springy and slightly damp.

- Add the worms
- Gently introduce your red wigglers onto the bedding. Leave the lid off for 5 minutes under a soft light—they will naturally burrow away from light.
- First feeding (tiny!)
- Push aside bedding in one corner, add a small handful of chopped scraps (think apple cores or coffee grounds), then cover with bedding.
- Put on the lid. That is it for day one.
🌿Smell test
A healthy bin smells earthy, not funky. Foul odors mean something is off: usually too much food, not enough airflow, or too wet. Do a quick audit (see Troubleshooting below).
Feeding, routine, and the ‘freezer scrap’ trick
Your worms are tiny, enthusiastic eaters—but they prefer a buffet, not a binge.
- Frequency: Feed small amounts 1–2 times a week to start, then increase as scraps disappear within 2–3 days.
- Chop it up: Smaller pieces break down faster and help avoid odors.
- Cover food: Always cover new scraps with bedding to prevent fruit flies and smells.
- Add browns regularly: Every feeding gets a handful of dry shredded cardboard on top.
The freezer scrap trick:
Yes foods:
- Fruit and veg scraps, peels, coffee grounds, tea leaves, paper tea filters, crushed eggshells (rinsed), small amounts of bread/grains.
No foods (or very little):
- Meat, dairy, oily foods, large amounts of citrus/onion/garlic, spicy peppers, heavily salted items.
Troubleshooting odors, pests, and moisture (aka how to keep it drama-free)
If something smells off or you spy fruit flies, do not panic. Your bin is a miniature ecosystem, and small tweaks usually fix everything.
- It smells sour or like garbage: You fed too much or it is too wet.
- Fix: Stop feeding for a week, fluff bedding for airflow, add a thick layer of dry cardboard on top to absorb excess moisture.
- Fruit flies or gnats: You likely left food exposed.
- Fix: Bury food deeper and cover with bedding. Add a top layer ‘blanket’ of damp newspaper or an old cotton T-shirt.
- Worms trying to escape: The environment is uncomfortable (too hot, too acidic, or too wet).
- Fix: Check temperature, add dry bedding, sprinkle in a small amount of crushed eggshells to buffer acidity.
- White fuzzy stuff on scraps: Natural fungi taking the first bite. Totally normal—worms will eat the fungi next.
- Too dry: Bedding feels papery and worms gather at the bottom.
- Fix: Mist with water and mix gently until it is like a wrung-out sponge.
Healthy worm bins are quiet, earthy, and low-maintenance. When in doubt, add more bedding and slow your feeding.
Chloe Greenfield
Harvesting your castings without chaos
When the bottom layer looks like rich, chocolatey crumbs (about 8–12 weeks in a stacking bin, longer for a single tote), it is harvest time. You have options:
- Migration method (least messy):
- Stop feeding the lower tray or side. Add food only to a fresh tray or the opposite side. Within 1–2 weeks, most worms migrate to the new buffet. Scoop out the nearly worm-free castings.
- Light sorting method (old school, works for totes):
- Dump contents onto a tarp under a bright light. Form a few small mounds. Wait a bit; worms will burrow from light. Gently collect the top layers of castings. Repeat until mostly worms remain; return them to fresh bedding.
How to use your castings:

Seasonal care and bin comfort
- Temperature: Keep between 55–77°F (13–25°C). In summer heat, move the bin to the coolest indoor spot; in winter, keep away from cold floors or drafty doors.
- Airflow: Fluff bedding gently every couple of weeks to prevent compaction.
- pH balance: Crushed eggshells help. Avoid large amounts of acidic foods (citrus).
- Travel: Going on vacation? Feed lightly and add extra bedding before you leave. Worms will be fine for 1–2 weeks.
🪱Advance care tip
If you have a moisture meter, aim for 60–80% moisture. If you do not, just stick to the wrung-out-sponge test. Simple wins.
FAQ: Real talk for the worm-curious
- Will my house smell? Not if the bin is set up correctly. It should smell like soil. Bad smells = too much food, too wet, or poor airflow—easy to fix.
- Will worms escape? They prefer their cozy, food-filled home. Occasional explorers happen, but widespread escape means conditions are off. See troubleshooting.
- Can I keep the bin in my kitchen? Yes! I do. A pantry or under-sink spot is great too.
- Can I add compostable plastics? No. Those need industrial facilities; they will not break down properly here.
- What about citrus? Small amounts are fine, but large amounts can acidify the bin. Balance with browns and eggshells.

Optional: DIY tote bin in 15 minutes
Materials:
- 10–18 gallon opaque tote with snug lid
- Drill with 1/8–1/4 inch bit
- 2 bricks/wood blocks or a second tote to catch drips
Steps:
- Drill 20–30 small holes in the lid for airflow.
- Drill a ring of 10–12 holes around the upper sides (2–3 inches from the top).
- Drill 6–10 holes in the bottom for drainage.
- Elevate on blocks over a tray or second tote to catch any liquid.
- Add bedding, worms, and a tiny first feeding. Done.
If you prefer to buy a ready-made kit, stacking tray systems make harvesting easy and clean: Worm Factory 360 or Vermihut 5-Tray
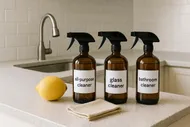
Bring your castings into your cleaning and plant routines
🎉Worm Bin Weekend Challenge
Set up your bin this weekend:
- Gather a tote or order a kit.
- Shred cardboard, hydrate coco coir, fluff bedding.
- Add 1 lb red wigglers and a tiny first feed.
- Share your setup pic and your coolest worm name on Instagram and tag us at @mysimple.life.official!
We will repost our favorites to inspire the community.
Instagram
- 10–18 gallon tote or stacking tray system
- Red wigglers (Eisenia fetida)
- Shredded cardboard + coconut coir
- Optional: moisture meter, thermometer, sifting screen
Helpful links:
You do not need a backyard to turn scraps into soil magic. You just need a small bin, a handful of helpful wigglers, and the curiosity to give it a try. Start tiny, keep it comfy, and let your kitchen waste do something wonderful. Your plants, your wallet, and the planet will feel the glow-up. Ready to be a worm whisperer by Monday? Let us wriggle!